Summary
This is a note on setting up the terminal on my new MacBook.
Prerequisites
- MacBook Pro 16-inch 2021
- macOS Monterey 12.2.1
Details
Install Homebrew
Since Catalina, the default login shell for Mac is zsh.
uzimihsr@MacBook ~ % echo $SHELL
/bin/zsh
uzimihsr@MacBook ~ % zsh --version
zsh 5.8 (x86_64-apple-darwin21.0)
At first, install Homebrew.
Open https://brew.sh and copy and paste the command in the terminal.
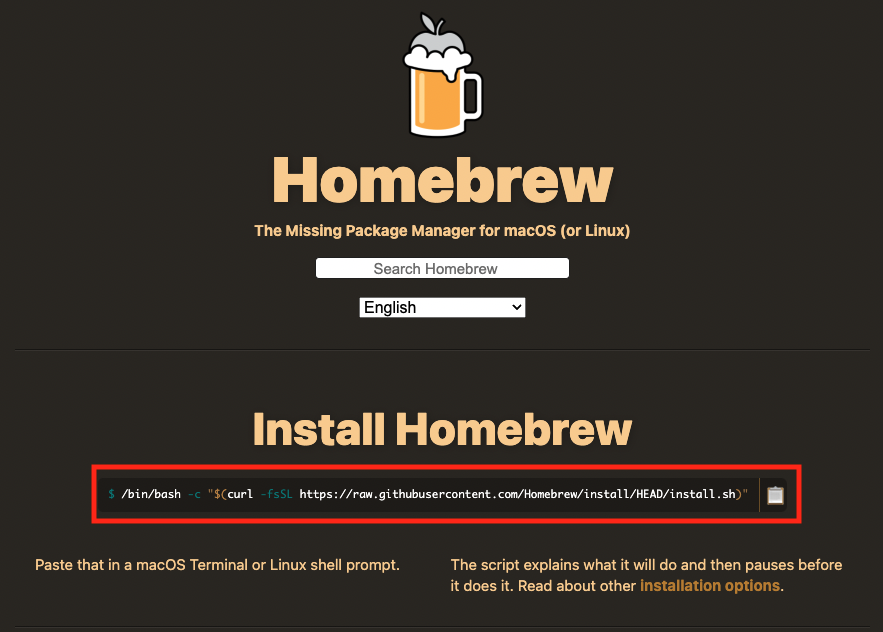
uzimihsr@MacBook ~ % /bin/bash -c "$(curl -fsSL https://raw.githubusercontent.com/Homebrew/install/HEAD/install.sh)"

...

Warning: /opt/homebrew/bin is not in your PATH.
  Instructions on how to configure your shell for Homebrew
  can be found in the 'Next steps' section below.
==> Installation successful!

...

==> Next steps:
- Run these two commands in your terminal to add Homebrew to your PATH:
    echo 'eval "$(/opt/homebrew/bin/brew shellenv)"' >> /Users/uzimihsr/.zprofile
    eval "$(/opt/homebrew/bin/brew shellenv)"
- Run brew help to get started
- Further documentation:
    https://docs.brew.sh
Follow the instructions to update the PATH.
uzimihsr@MacBook ~ % echo 'eval "$(/opt/homebrew/bin/brew shellenv)"' >> /Users/$USER/.zprofile
uzimihsr@MacBook ~ % eval "$(/opt/homebrew/bin/brew shellenv)"
uzimihsr@MacBook ~ % brew doctor
Your system is ready to brew.
uzimihsr@MacBook ~ % which brew
/opt/homebrew/bin/brew
uzimihsr@MacBook ~ % brew --version
Homebrew 3.4.10
Homebrew/homebrew-core (git revision 239cad746ef; last commit 2022-05-03)
Good.
Now I can use the brew command.
Install zsh plugins
Next, install the following zsh plugins with brew.
uzimihsr@MacBook ~ % brew install zsh-autosuggestions
...
==> Caveats
To activate the autosuggestions, add the following at the end of your .zshrc:

  source /opt/homebrew/share/zsh-autosuggestions/zsh-autosuggestions.zsh

You will also need to restart your terminal for this change to take effect.
...

uzimihsr@MacBook ~ % brew install zsh-completions
...
==> Caveats
To activate these completions, add the following to your .zshrc:

  if type brew &>/dev/null; then
    FPATH=$(brew --prefix)/share/zsh-completions:$FPATH

    autoload -Uz compinit
    compinit
  fi

You may also need to force rebuild `zcompdump`:

  rm -f ~/.zcompdump; compinit

Additionally, if you receive "zsh compinit: insecure directories" warnings when attempting
to load these completions, you may need to run this:

  chmod -R go-w '/opt/homebrew/share/zsh'
...

uzimihsr@MacBook ~ % brew install zsh-syntax-highlighting
...
==> Caveats
To activate the syntax highlighting, add the following at the end of your .zshrc:
  source /opt/homebrew/share/zsh-syntax-highlighting/zsh-syntax-highlighting.zsh

If you receive "highlighters directory not found" error message,
you may need to add the following to your .zshenv:
  export ZSH_HIGHLIGHT_HIGHLIGHTERS_DIR=/opt/homebrew/share/zsh-syntax-highlighting/highlighters
...
Follow the instructions to create ~/.zshrc, then restart the terminal.
uzimihsr@MacBook ~ % cat ~/.zshrc
# zsh-autosuggestions
source /opt/homebrew/share/zsh-autosuggestions/zsh-autosuggestions.zsh

# zsh-completions
if type brew &>/dev/null; then
  FPATH=$(brew --prefix)/share/zsh-completions:$FPATH

  autoload -Uz compinit
  compinit
fi

# zsh-syntax-highlighting
source /opt/homebrew/share/zsh-syntax-highlighting/zsh-syntax-highlighting.zsh
Follow the instructions on zsh-completions to rebuild zcompdump.
The “zsh compinit: insecure directories” error did not go away with the command as instructed, so I was a bit worn out.
uzimihsr@MacBook ~ % rm -f ~/.zcompdump; compinit
zsh compinit: insecure directories, run compaudit for list.
Ignore insecure directories and continue [y] or abort compinit [n]? y
uzimihsr@MacBook ~ % chmod -R go-w '/opt/homebrew/share/zsh'
uzimihsr@MacBook ~ % rm -f ~/.zcompdump; compinit
zsh compinit: insecure directories, run compaudit for list.
Ignore insecure directories and continue [y] or abort compinit [n]? y

uzimihsr@MacBook ~ % compaudit
There are insecure directories:
/opt/homebrew/share
uzimihsr@MacBook ~ % chmod -R go-w '/opt/homebrew/share'
uzimihsr@MacBook ~ % rm -f ~/.zcompdump; compinit
Restart the terminal again, and all plugins are enabled.
Configure PROMPT
Set up the PROMPT to be more convenient.
My PROMPT shows the current directory and a newlined $.
The Z Shell Manual has more details on the variables that can be used with the PROMPT.
uzimihsr@MacBook ~ % PROMPT=""$'\n'"%d"$'\n'"$ "

/Users/uzimihsr
$
Finally, update ~/.zshrc.
$ cat ~/.zshrc
PROMPT=""$'\n'"%d"$'\n'"$ "
...
Install iterm2
Install iterm2 with homebrew cask.
$ brew install --cask iterm2
==> Tapping homebrew/cask
Cloning into '/opt/homebrew/Library/Taps/homebrew/homebrew-cask'...
remote: Enumerating objects: 635835, done.
remote: Counting objects: 100% (9/9), done.
remote: Compressing objects: 100% (5/5), done.
remote: Total 635835 (delta 4), reused 9 (delta 4), pack-reused 635826
Receiving objects: 100% (635835/635835), 299.65 MiB | 4.39 MiB/s, done.
Resolving deltas: 100% (450073/450073), done.
Tapped 3994 casks (4,066 files, 320.0MB).
==> Downloading https://iterm2.com/downloads/stable/iTerm2-3_4_15.zip
######################################################################## 100.0%
==> Installing Cask iterm2
==> Moving App 'iTerm.app' to '/Applications/iTerm.app'
🍺  iterm2 was successfully installed!
I like to double-tap Control(⌃) to show and hide the terminal with Hotkeys.
Open “Preference(⌘,)"→“Keys”→“Hotkey”→“Create a Dedicated Hotkey window…”.
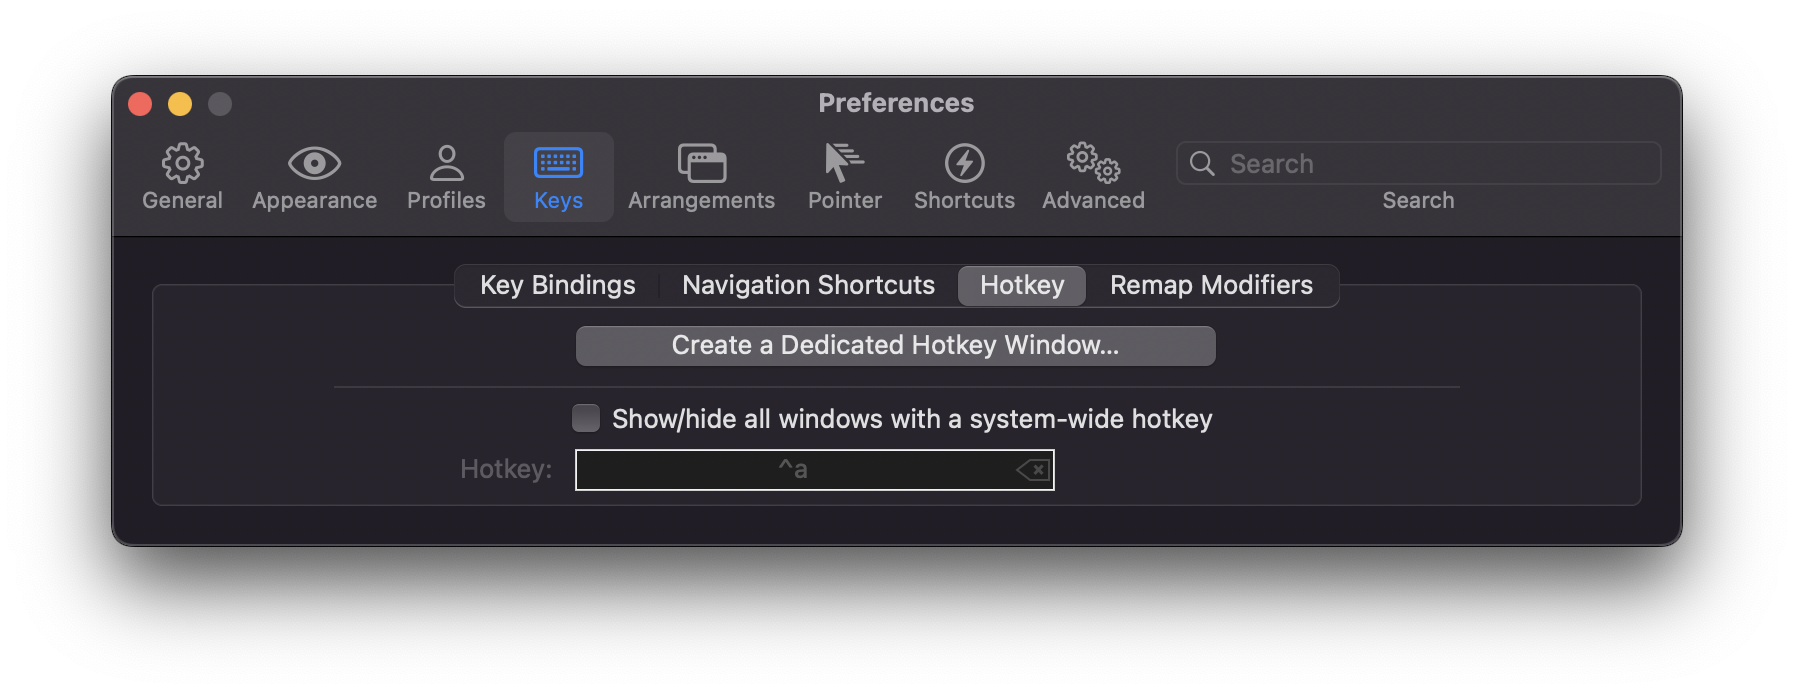
Set up the Hotkey window as shown in the images below.
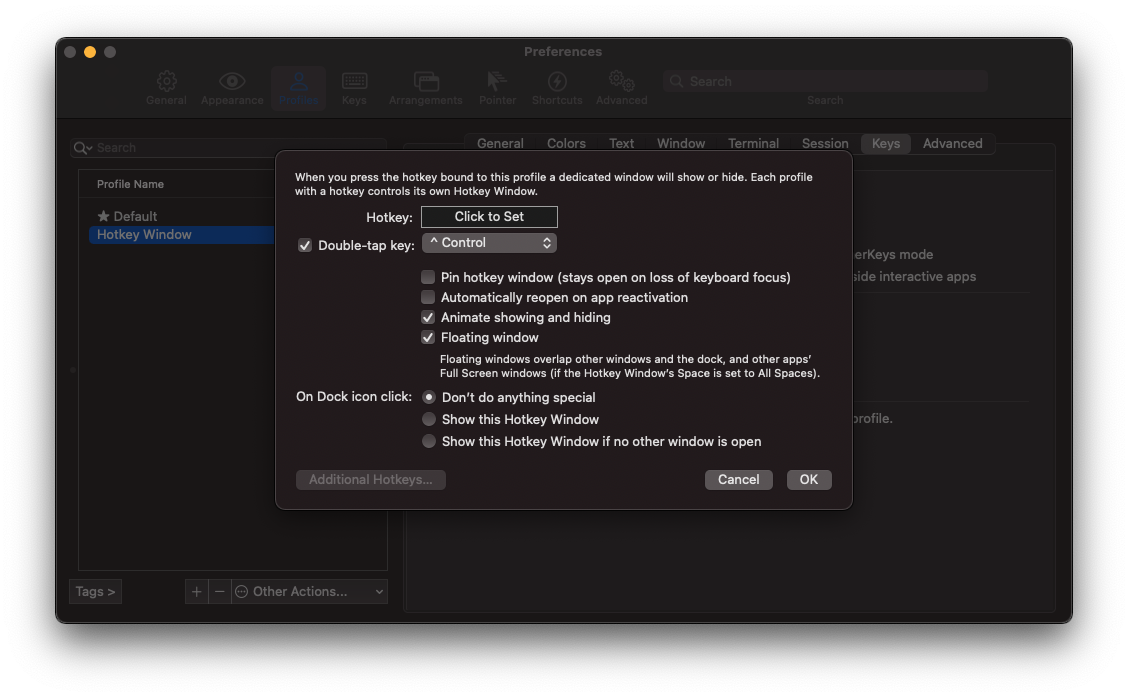
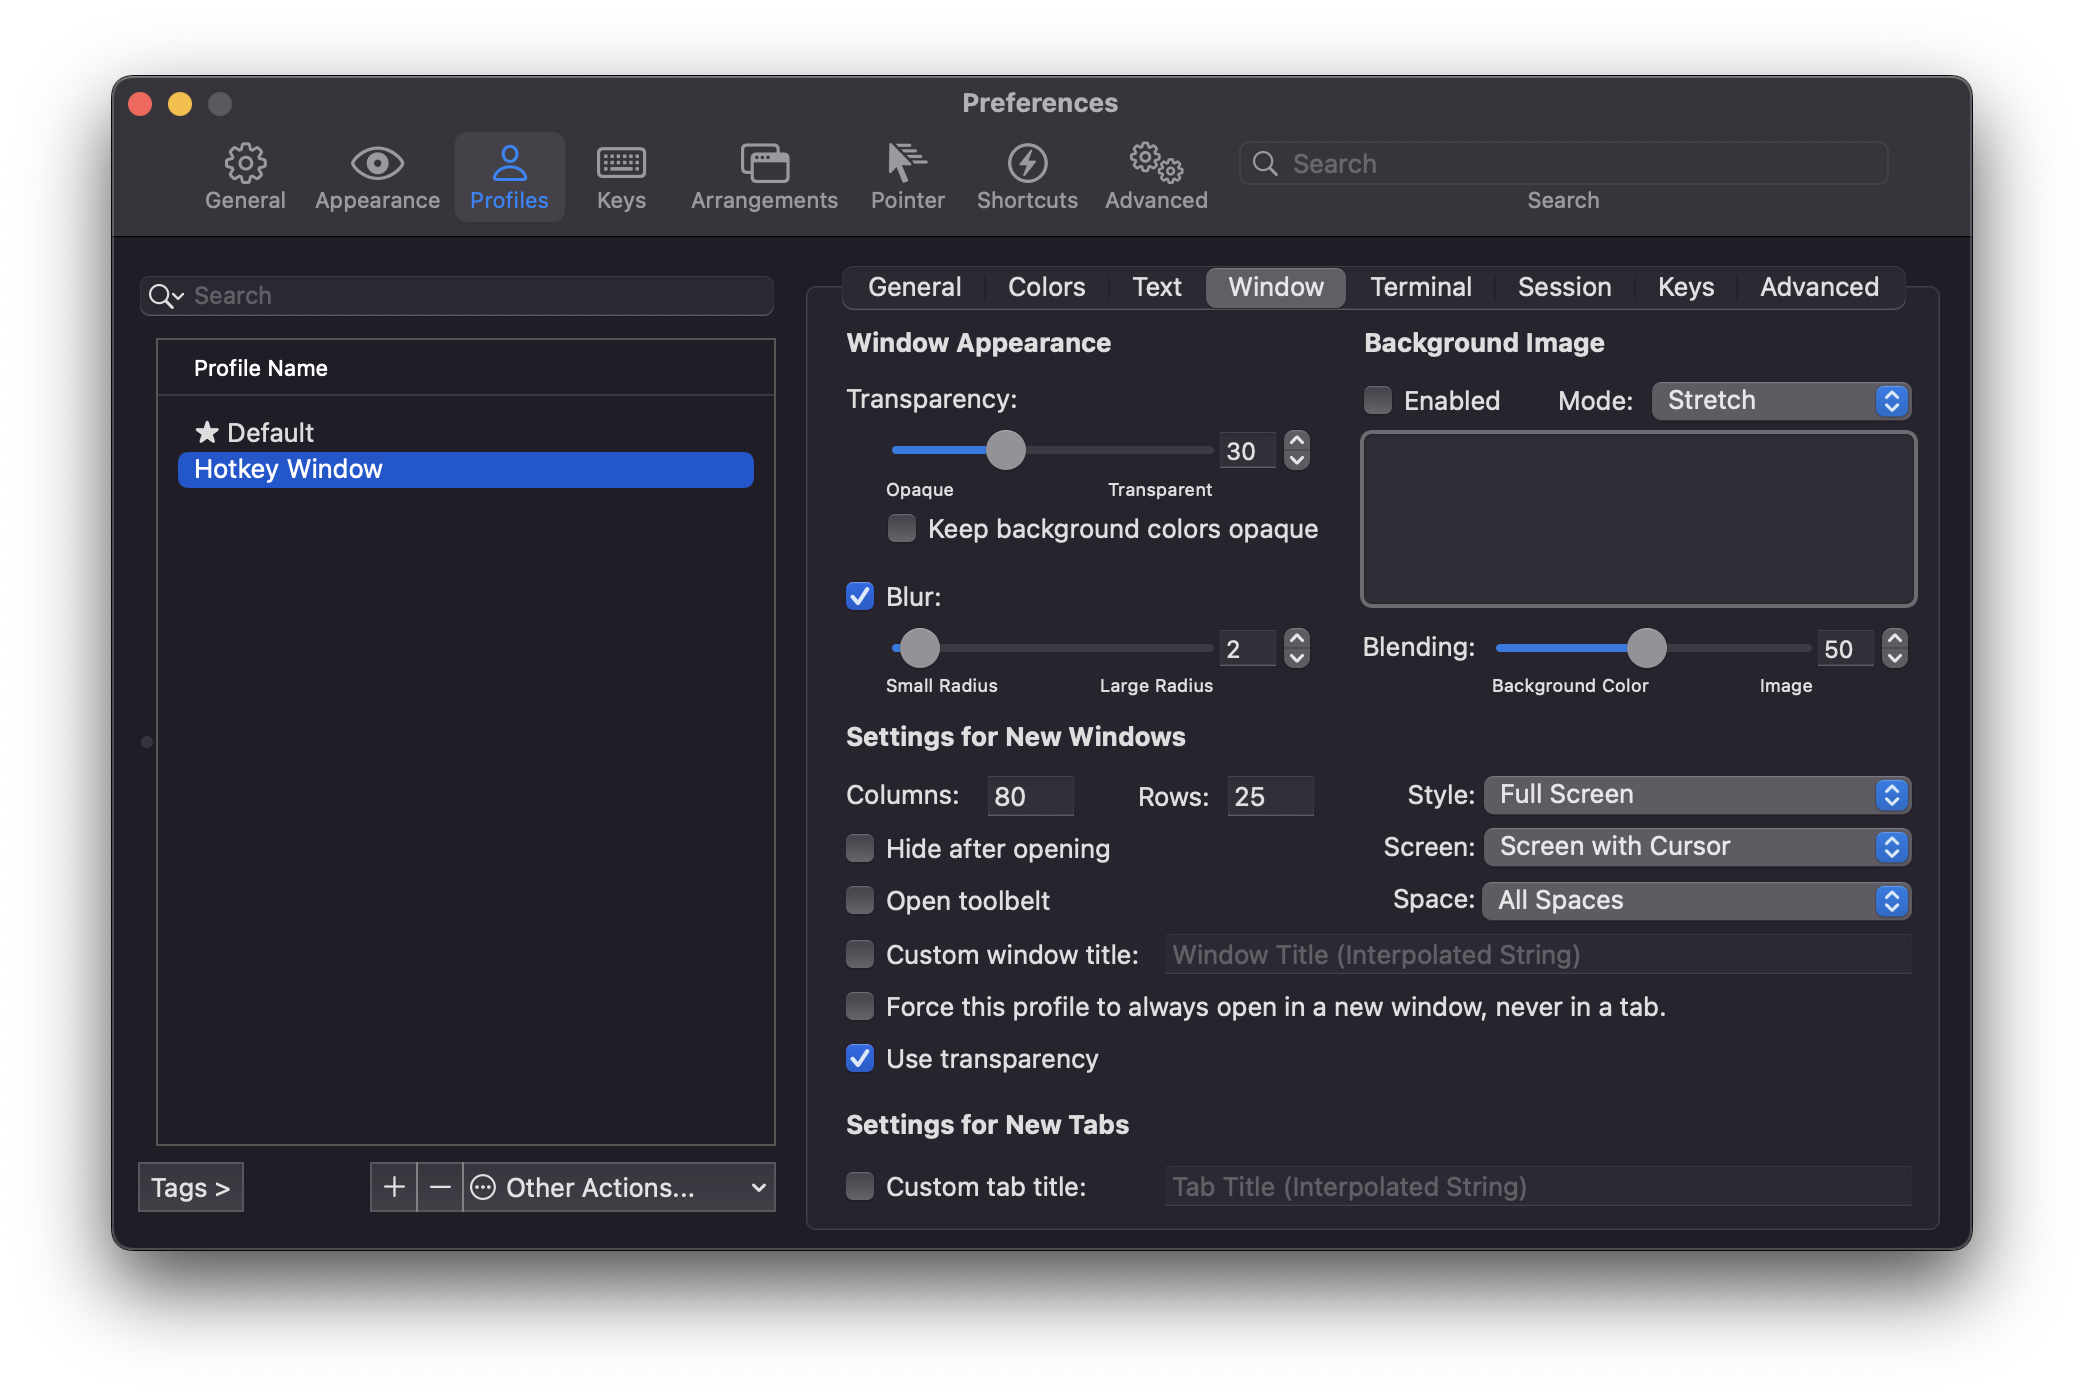
In addition, go to “Advanced”→“Open a new window when you click the dock icon…” and specify “No” to prevent opening a new terminal window except with a hotkey.
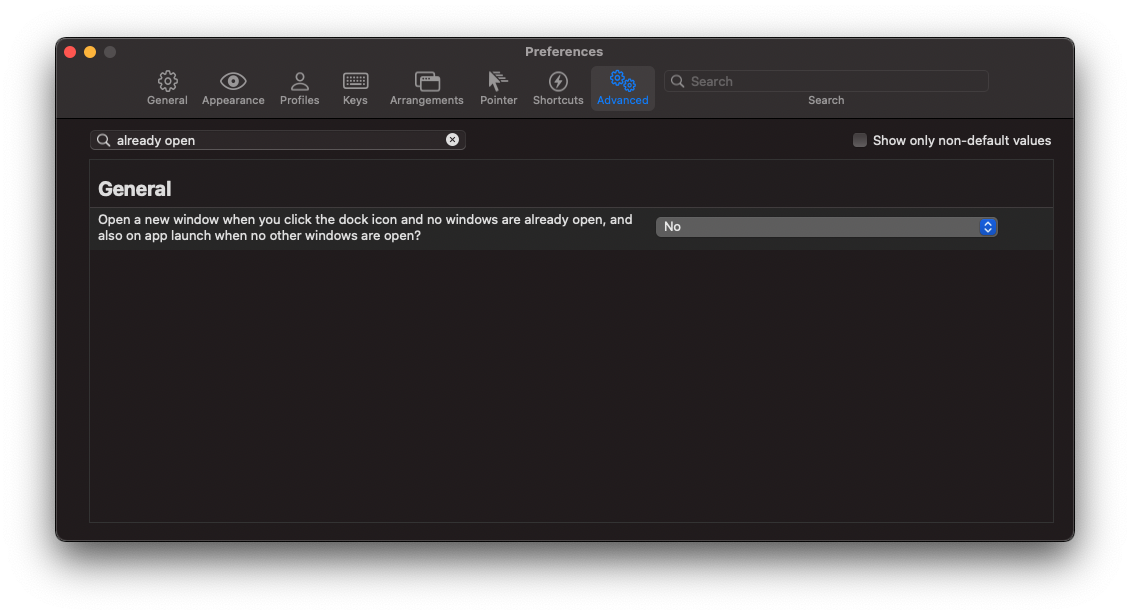
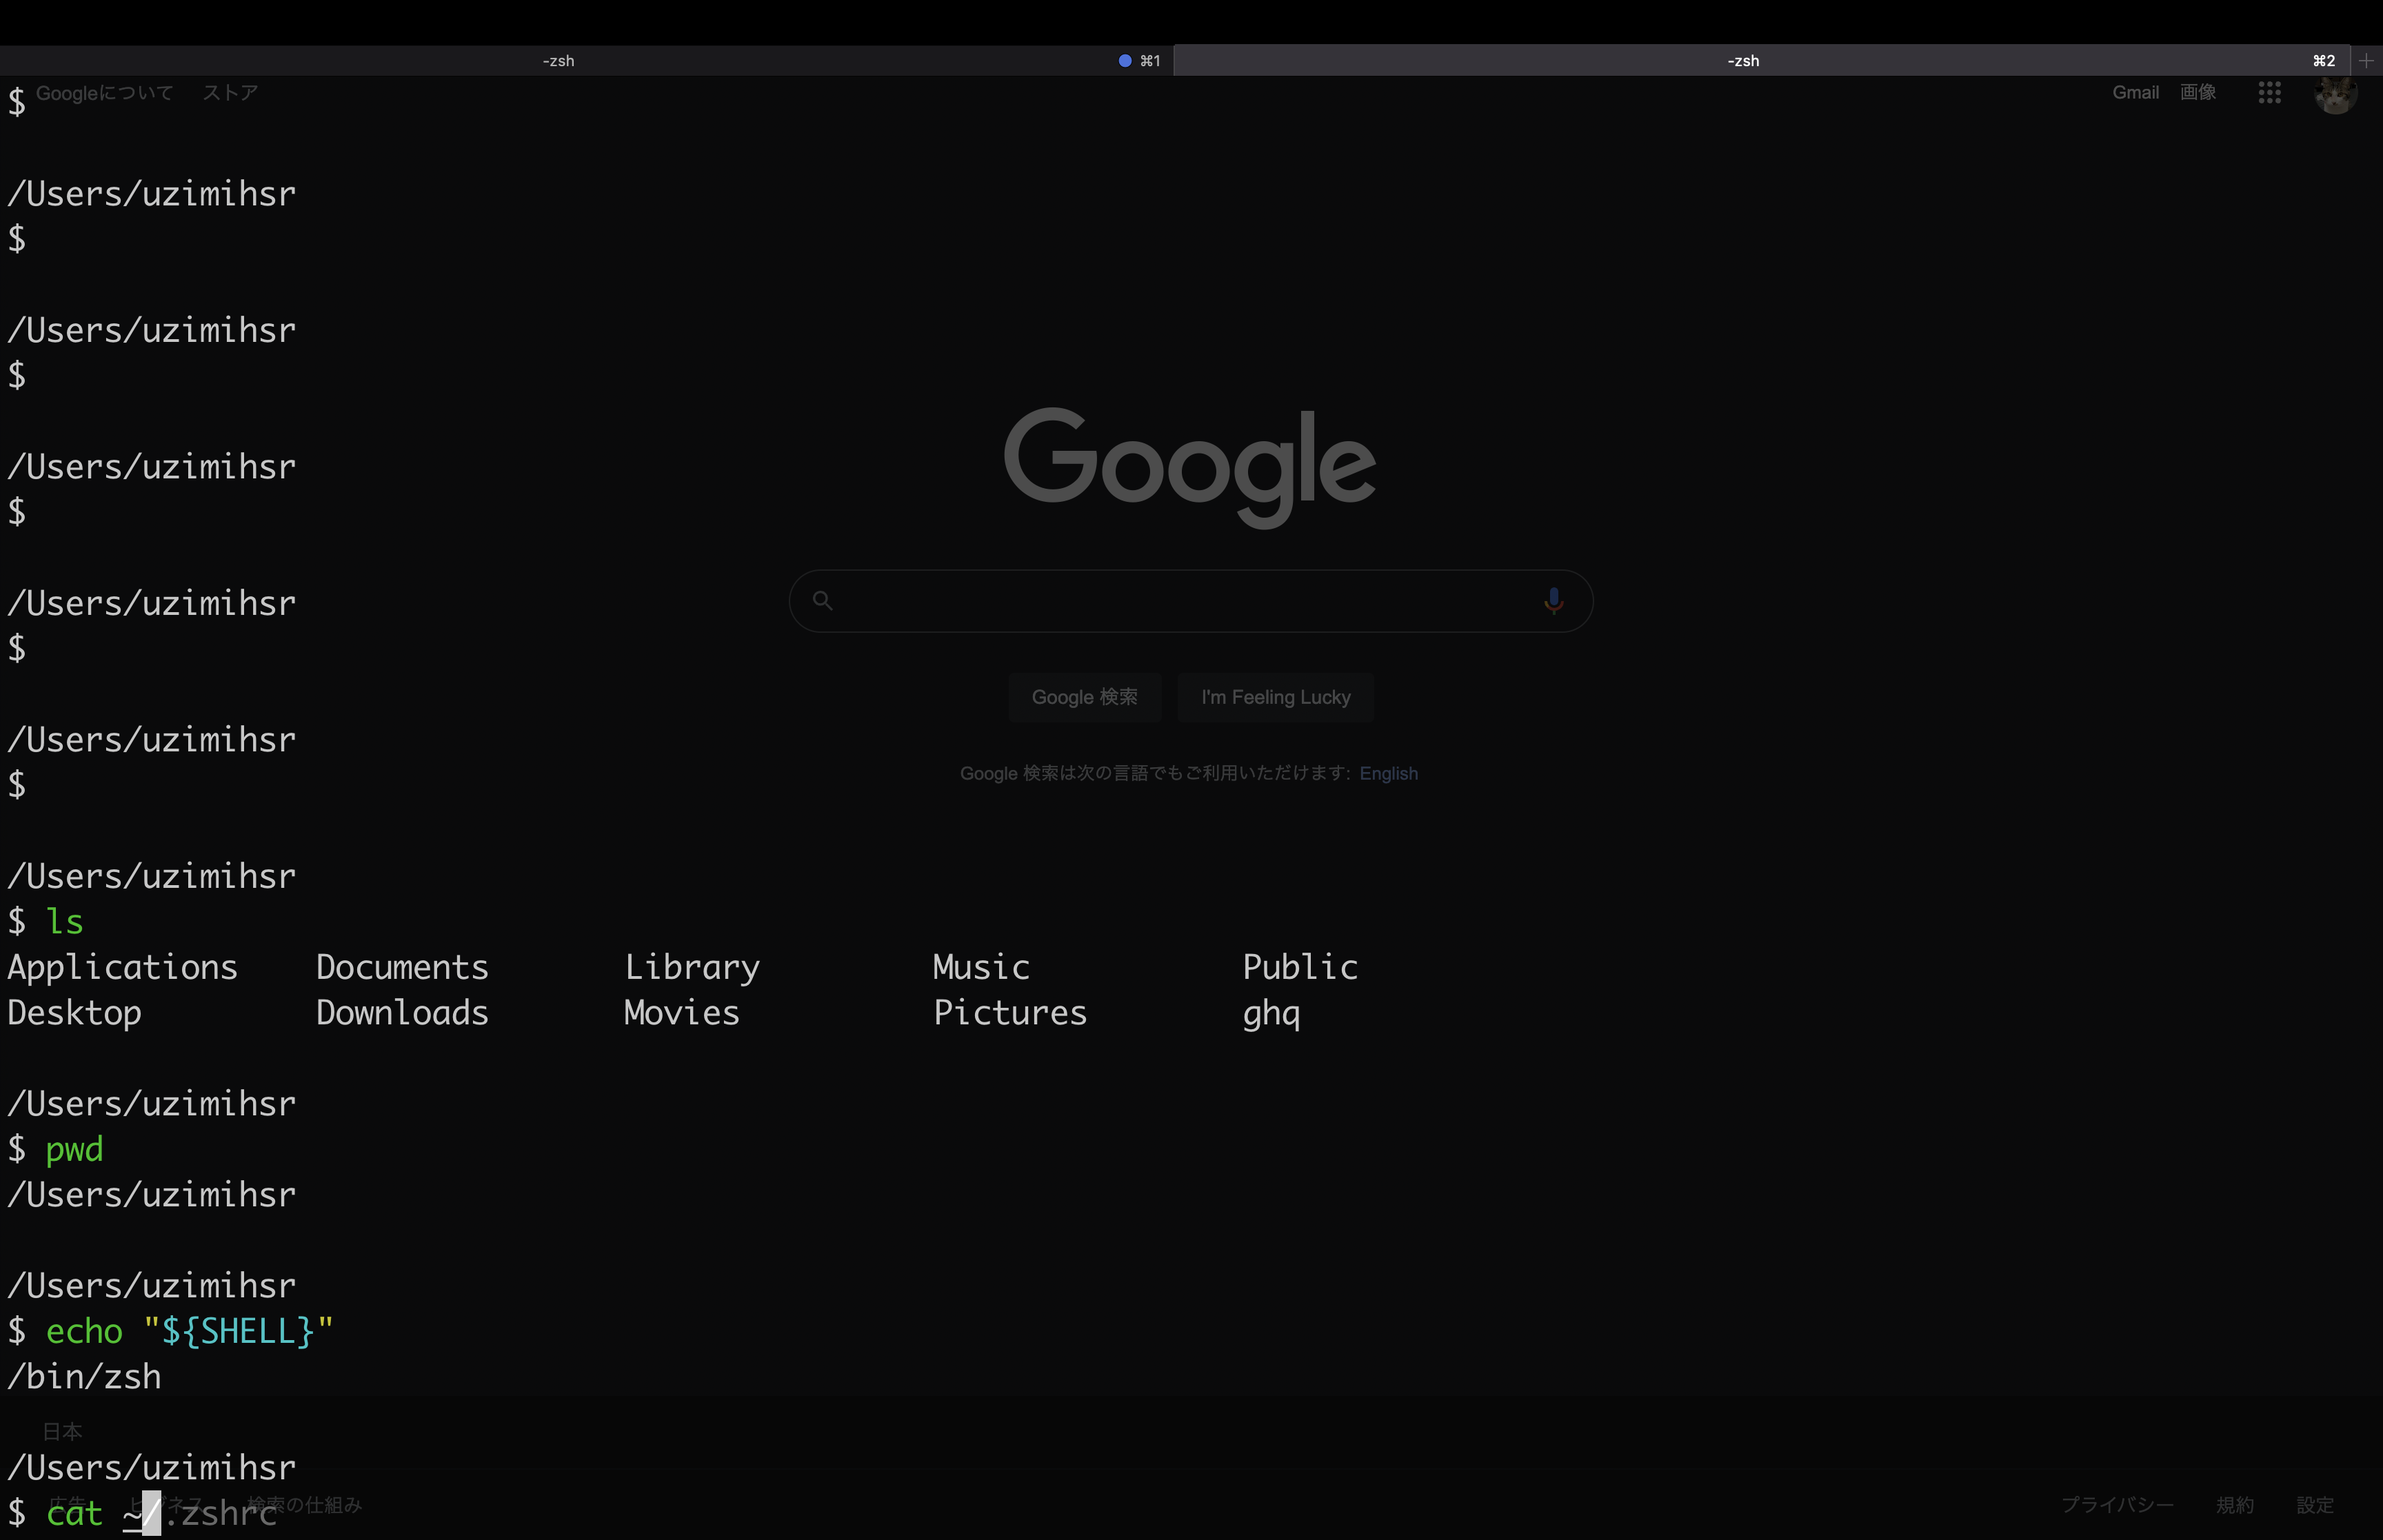
Restart iterm2 and hit Control(⌃) repeatedly and the terminal will flap open and close.
(The following is the same content in Japanese.)
まとめ
MacBookを買い換えたので、ターミナル周りの設定をした。
あんまりやる機会もないけど一応自分用にログを残しておく。
環境
- MacBook Pro 16-inch 2021
- macOS Monterey 12.2.1
やったこと
Homebrewのインストール
新しいMacが起動したのでまずはシェルをzshに…
と思ったらだいぶ前(Catalina?)からデフォルトでシェルがzshになっていたらしい。
uzimihsr@MacBook ~ % echo $SHELL
/bin/zsh
uzimihsr@MacBook ~ % zsh --version
zsh 5.8 (x86_64-apple-darwin21.0)
zshのプラグインを入れたいし、後でいろんなものを入れるのに使うのでまずはbrewが使えるようにする。
ターミナルを開き、https://brew.shからコマンドをコピーしてきて貼り付け。
uzimihsr@MacBook ~ % /bin/bash -c "$(curl -fsSL https://raw.githubusercontent.com/Homebrew/install/HEAD/install.sh)"

...

Warning: /opt/homebrew/bin is not in your PATH.
  Instructions on how to configure your shell for Homebrew
  can be found in the 'Next steps' section below.
==> Installation successful!

...

==> Next steps:
- Run these two commands in your terminal to add Homebrew to your PATH:
    echo 'eval "$(/opt/homebrew/bin/brew shellenv)"' >> /Users/uzimihsr/.zprofile
    eval "$(/opt/homebrew/bin/brew shellenv)"
- Run brew help to get started
- Further documentation:
    https://docs.brew.sh
途中でPATHを通せ的な指示があったのでそれに従い、動作を確認する。
uzimihsr@MacBook ~ % echo 'eval "$(/opt/homebrew/bin/brew shellenv)"' >> /Users/$USER/.zprofile
uzimihsr@MacBook ~ % eval "$(/opt/homebrew/bin/brew shellenv)"
uzimihsr@MacBook ~ % brew doctor
Your system is ready to brew.
uzimihsr@MacBook ~ % which brew
/opt/homebrew/bin/brew
uzimihsr@MacBook ~ % brew --version
Homebrew 3.4.10
Homebrew/homebrew-core (git revision 239cad746ef; last commit 2022-05-03)
これでbrewが使えるようになった。
zshプラグインのインストール
zshを快適に使うために下記のプラグインをbrewで入れる。
uzimihsr@MacBook ~ % brew install zsh-autosuggestions
...
==> Caveats
To activate the autosuggestions, add the following at the end of your .zshrc:

  source /opt/homebrew/share/zsh-autosuggestions/zsh-autosuggestions.zsh

You will also need to restart your terminal for this change to take effect.
...

uzimihsr@MacBook ~ % brew install zsh-completions
...
==> Caveats
To activate these completions, add the following to your .zshrc:

  if type brew &>/dev/null; then
    FPATH=$(brew --prefix)/share/zsh-completions:$FPATH

    autoload -Uz compinit
    compinit
  fi

You may also need to force rebuild `zcompdump`:

  rm -f ~/.zcompdump; compinit

Additionally, if you receive "zsh compinit: insecure directories" warnings when attempting
to load these completions, you may need to run this:

  chmod -R go-w '/opt/homebrew/share/zsh'
...

uzimihsr@MacBook ~ % brew install zsh-syntax-highlighting
...
==> Caveats
To activate the syntax highlighting, add the following at the end of your .zshrc:
  source /opt/homebrew/share/zsh-syntax-highlighting/zsh-syntax-highlighting.zsh

If you receive "highlighters directory not found" error message,
you may need to add the following to your .zshenv:
  export ZSH_HIGHLIGHT_HIGHLIGHTERS_DIR=/opt/homebrew/share/zsh-syntax-highlighting/highlighters
...インストール時の指示に従い、~/.zshrcを作成する。
uzimihsr@MacBook ~ % cat ~/.zshrc
# zsh-autosuggestions
source /opt/homebrew/share/zsh-autosuggestions/zsh-autosuggestions.zsh

# zsh-completions
if type brew &>/dev/null; then
  FPATH=$(brew --prefix)/share/zsh-completions:$FPATH

  autoload -Uz compinit
  compinit
fi

# zsh-syntax-highlighting
source /opt/homebrew/share/zsh-syntax-highlighting/zsh-syntax-highlighting.zsh
ここで一旦ターミナルを閉じてから再度起動する。
zsh-completionsのインストール時に指示された通り、zcompdumpを再作成する。
指示された通りのコマンドでは"zsh compinit: insecure directories"のエラーが消えなかったのでちょっと消耗した。
uzimihsr@MacBook ~ % rm -f ~/.zcompdump; compinit
zsh compinit: insecure directories, run compaudit for list.
Ignore insecure directories and continue [y] or abort compinit [n]? y
uzimihsr@MacBook ~ % chmod -R go-w '/opt/homebrew/share/zsh'
uzimihsr@MacBook ~ % rm -f ~/.zcompdump; compinit
zsh compinit: insecure directories, run compaudit for list.
Ignore insecure directories and continue [y] or abort compinit [n]? y

uzimihsr@MacBook ~ % compaudit
There are insecure directories:
/opt/homebrew/share
uzimihsr@MacBook ~ % chmod -R go-w '/opt/homebrew/share'
uzimihsr@MacBook ~ % rm -f ~/.zcompdump; compinit
もう一度再起動すると今回追加したプラグインが全て有効になっている。
プロンプトをいじる
初期設定のプロンプトだと使いづらいのでここでいじっておく。
PROMPTで使える変数についてはThe Z Shell Manualが詳しい。
自分は割とシンプルなのが好きで、
直前のコマンド実行結果から改行されてカレントディレクトリが表示できていればそれでいい。
uzimihsr@MacBook ~ % PROMPT=""$'\n'"%d"$'\n'"$ "

/Users/uzimihsr
$色々試して気に入ったものができたので、~/.zshrcに書いておく。
$ cat ~/.zshrc
PROMPT=""$'\n'"%d"$'\n'"$ "
...
iterm2のインストール
ターミナルも標準のままだと不便なので、
homebrew caskを使ってiterm2をインストールする。
$ brew install --cask iterm2
==> Tapping homebrew/cask
Cloning into '/opt/homebrew/Library/Taps/homebrew/homebrew-cask'...
remote: Enumerating objects: 635835, done.
remote: Counting objects: 100% (9/9), done.
remote: Compressing objects: 100% (5/5), done.
remote: Total 635835 (delta 4), reused 9 (delta 4), pack-reused 635826
Receiving objects: 100% (635835/635835), 299.65 MiB | 4.39 MiB/s, done.
Resolving deltas: 100% (450073/450073), done.
Tapped 3994 casks (4,066 files, 320.0MB).
==> Downloading https://iterm2.com/downloads/stable/iTerm2-3_4_15.zip
######################################################################## 100.0%
==> Installing Cask iterm2
==> Moving App 'iTerm.app' to '/Applications/iTerm.app'
🍺 iterm2 was successfully installed!自分はCtrl(⌃)を2回叩いてターミナルを出したり消したりできるのが好きなので、
Hotkeysを参考にitermの設定をいじっていく。
Preferenceを開き、“Keys”→“Hotkey”→“Create a Dedicated Hotkey window…“と進む。
下記画像のように設定していく。
また、ターミナルを開くのはhotkeyだけにしたいので、itermの起動時に自動で新規ターミナルを開かないようにする。
“Advanced"から"Open a new window when you click the dock icon…“を"No"に変更する。
iterm2を再起動し、Ctrl(⌃)を連打するとターミナルがパカパカ開いたり閉じたりするようになる。
他にもやりたいことはあるけど、一旦ここまで。
おわり
新しく買ったMacBookでターミナルの設定をしてみた。
M1チップが出た当初はbrewとかも結構大変だったみたいだけど、
もう1年以上経っていたおかげかだいぶ設定もしやすかった。
本当はdotfilesをちゃんと定期的に管理した方が賢いと思うけど、
手作業で設定していくのも結構楽しい…
おまけ